Get ready for some potential headaches 😬
As functional as smartwatches are, they also serve as a great extension of your outfit/style. A leather band can help dress up a watch when at a formal gathering, but a silicone one is much better-suited when hitting the gym.
 The Fitbit Versa comes with a standard silicone band that can be worn just about anywhere, and while it looks and feels just fine, there are a number of first and third-party bands to choose from to help dress up the watch to your exact liking.
Fitbit opted for a proprietary band system with the Versa, and it's different from the other one introduced on the Ionic. The new setup can be a pain to deal with, so if you need a helping hand, you're in the right place.
Step 1 – Push in on the lever of your existing band
The Fitbit Versa comes with a standard silicone band that can be worn just about anywhere, and while it looks and feels just fine, there are a number of first and third-party bands to choose from to help dress up the watch to your exact liking.
Fitbit opted for a proprietary band system with the Versa, and it's different from the other one introduced on the Ionic. The new setup can be a pain to deal with, so if you need a helping hand, you're in the right place.
Step 1 – Push in on the lever of your existing band
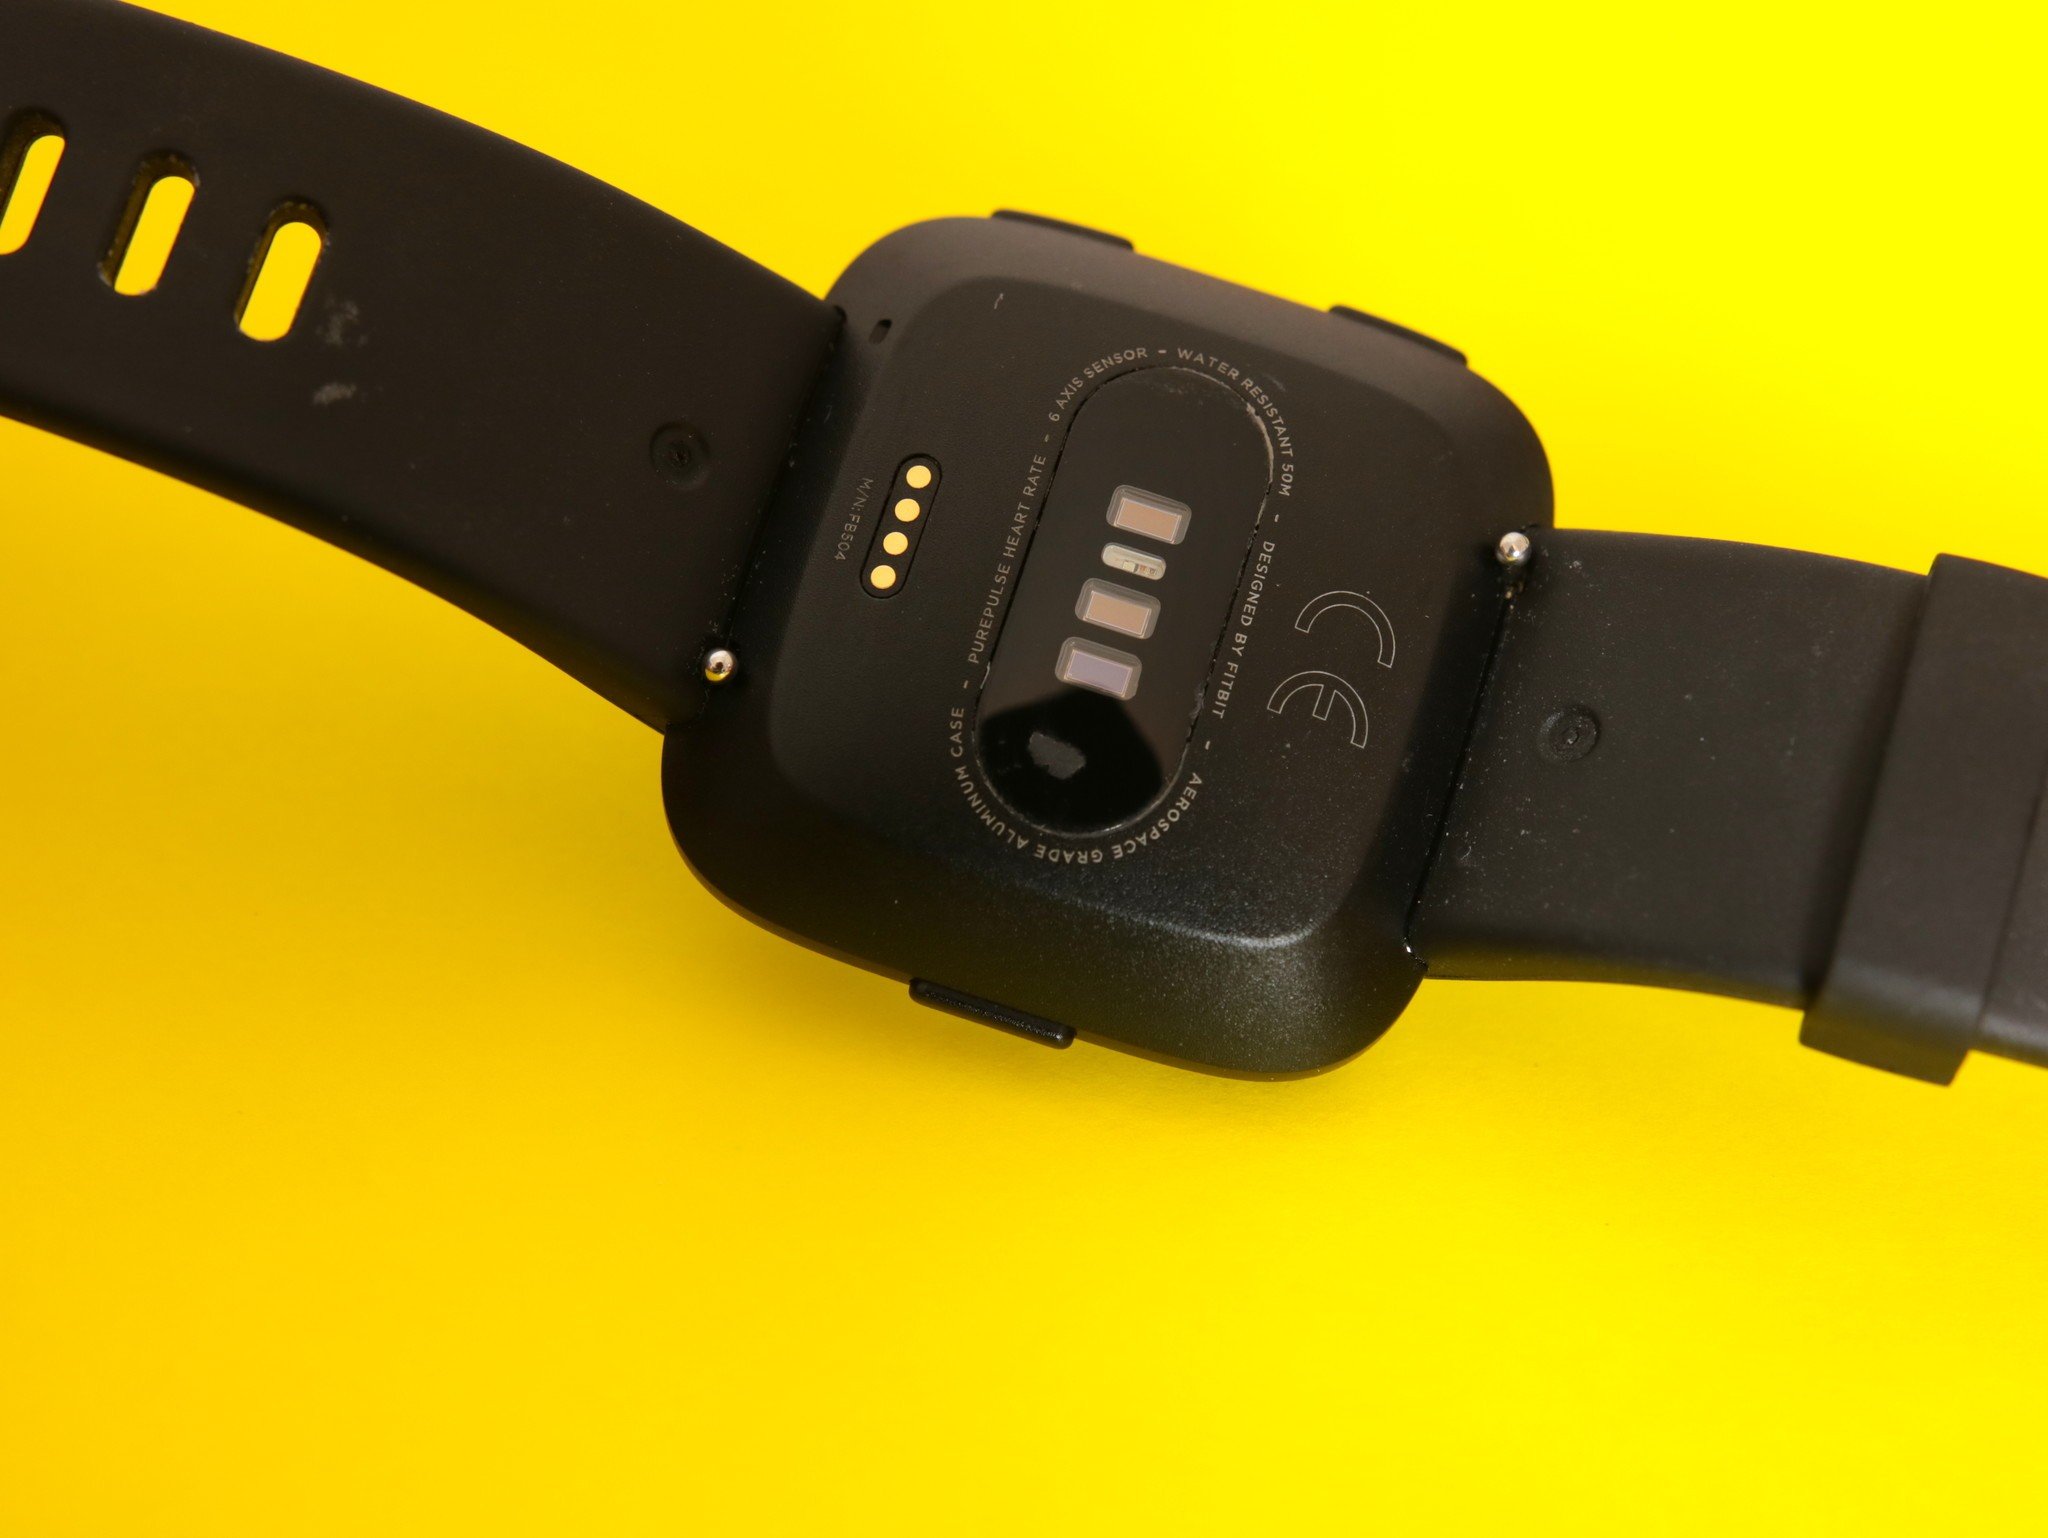
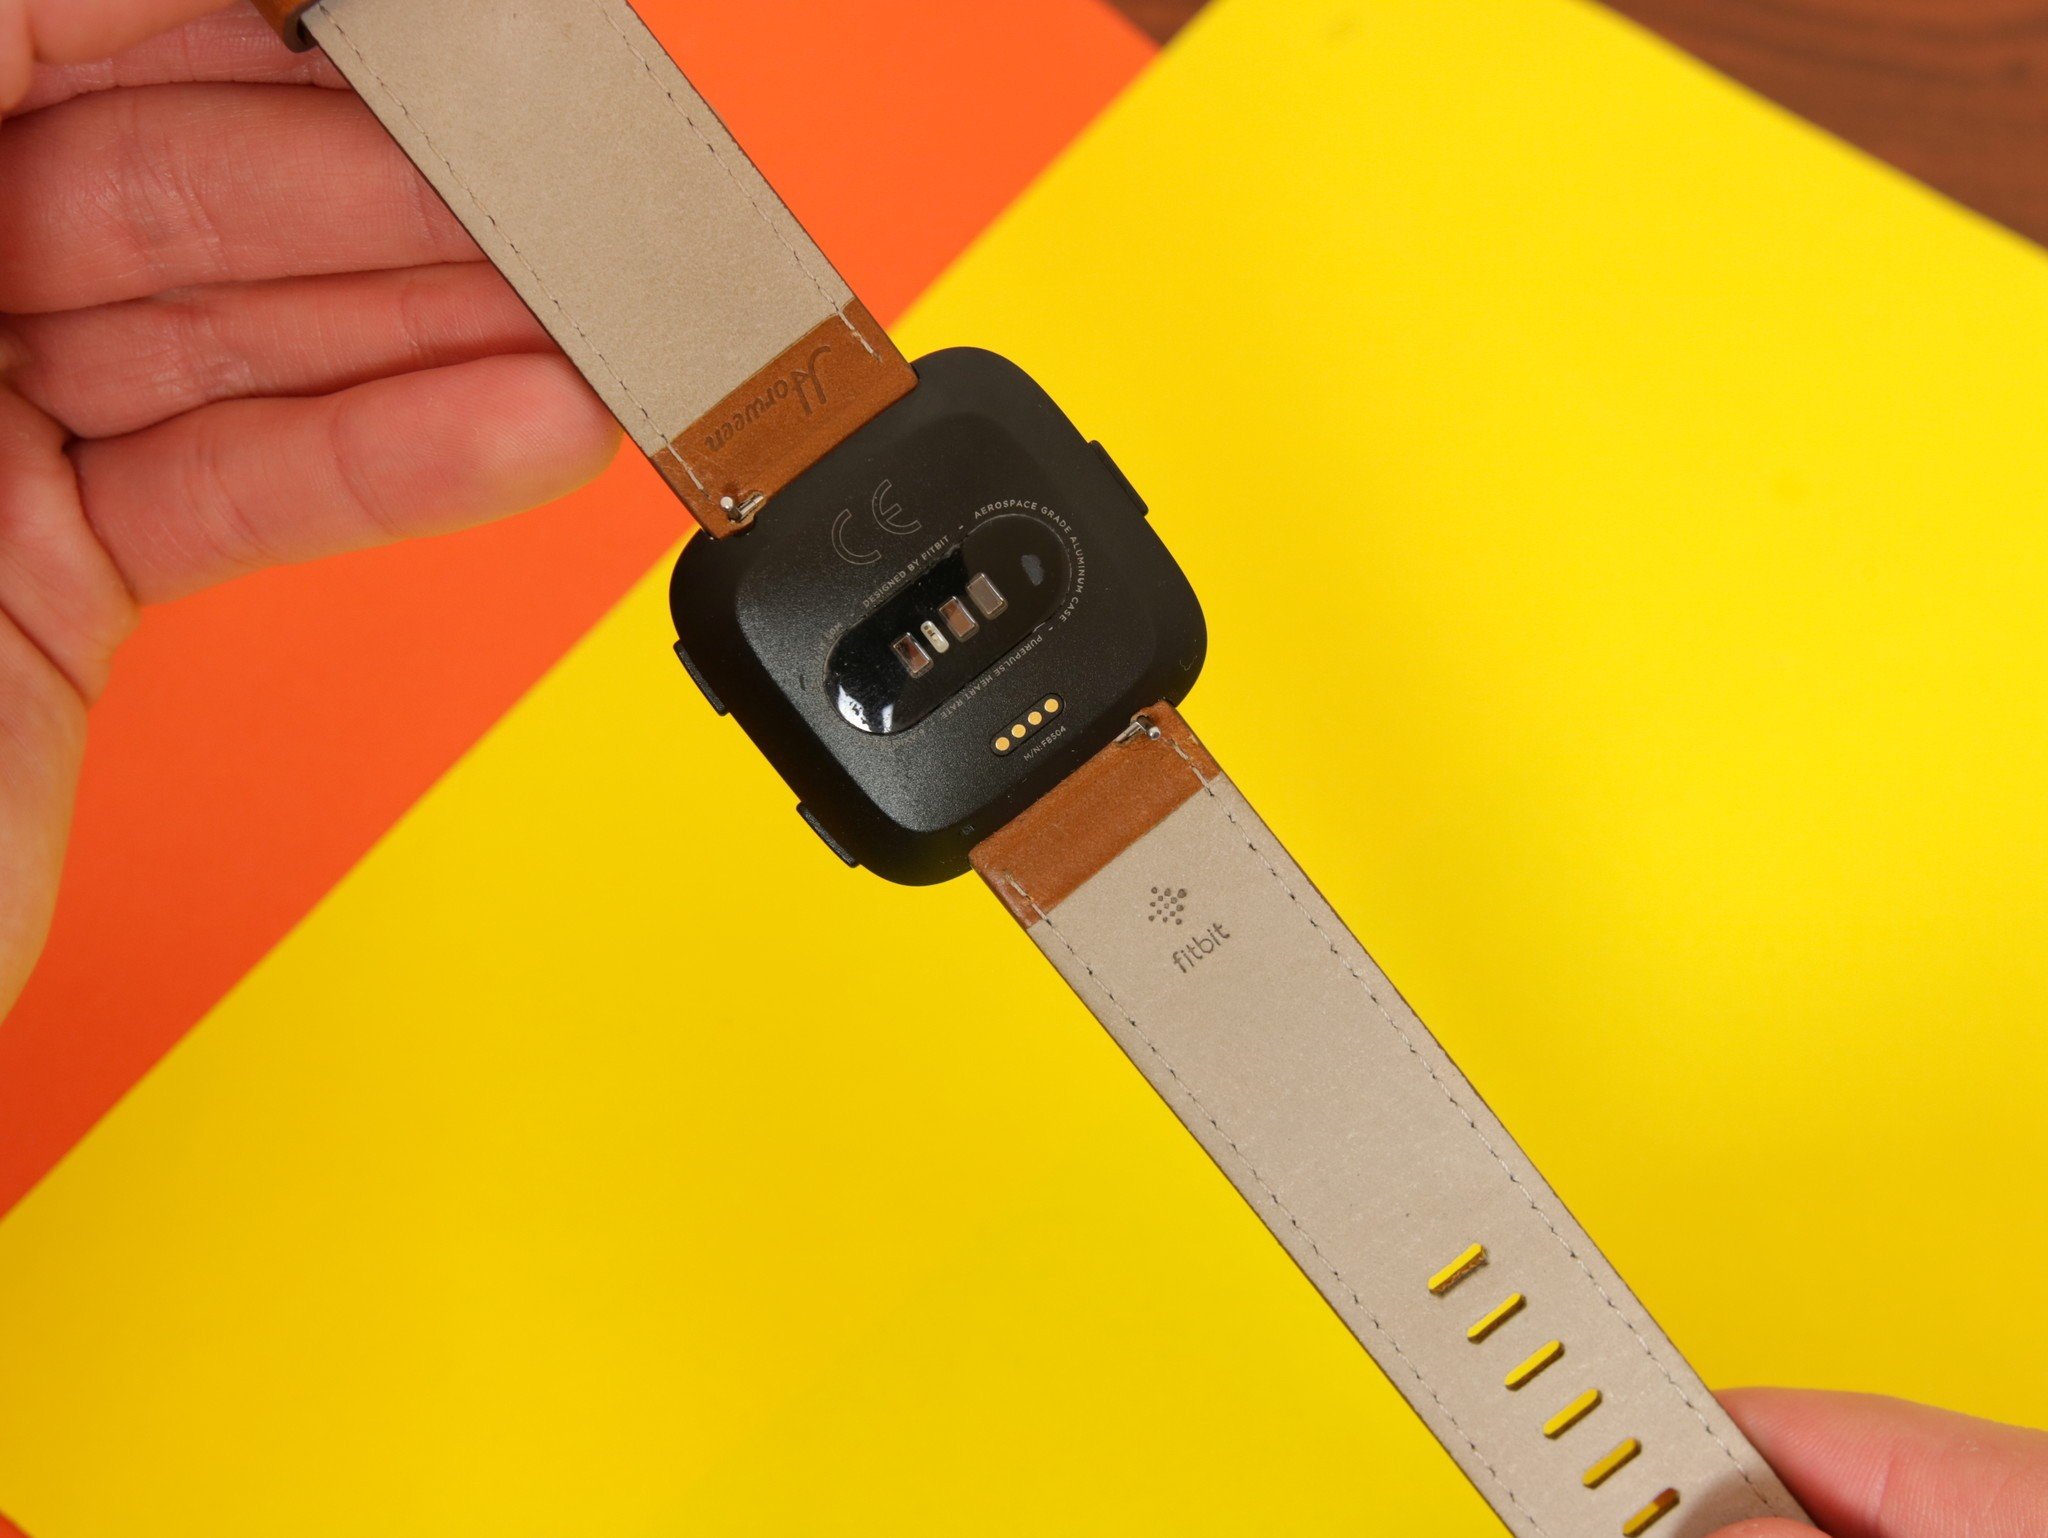
 With your Fitbit Versa turned upside down, find the quick-release lever (it's the small metal pin near the Versa's body).
Once you've located it, use your finger to push it in towards the middle of the watch. Not much pressure is required to get it to move, but having fingernails will certainly help!
Step 2 – Pull the band away from the Versa
With your Fitbit Versa turned upside down, find the quick-release lever (it's the small metal pin near the Versa's body).
Once you've located it, use your finger to push it in towards the middle of the watch. Not much pressure is required to get it to move, but having fingernails will certainly help!
Step 2 – Pull the band away from the Versa
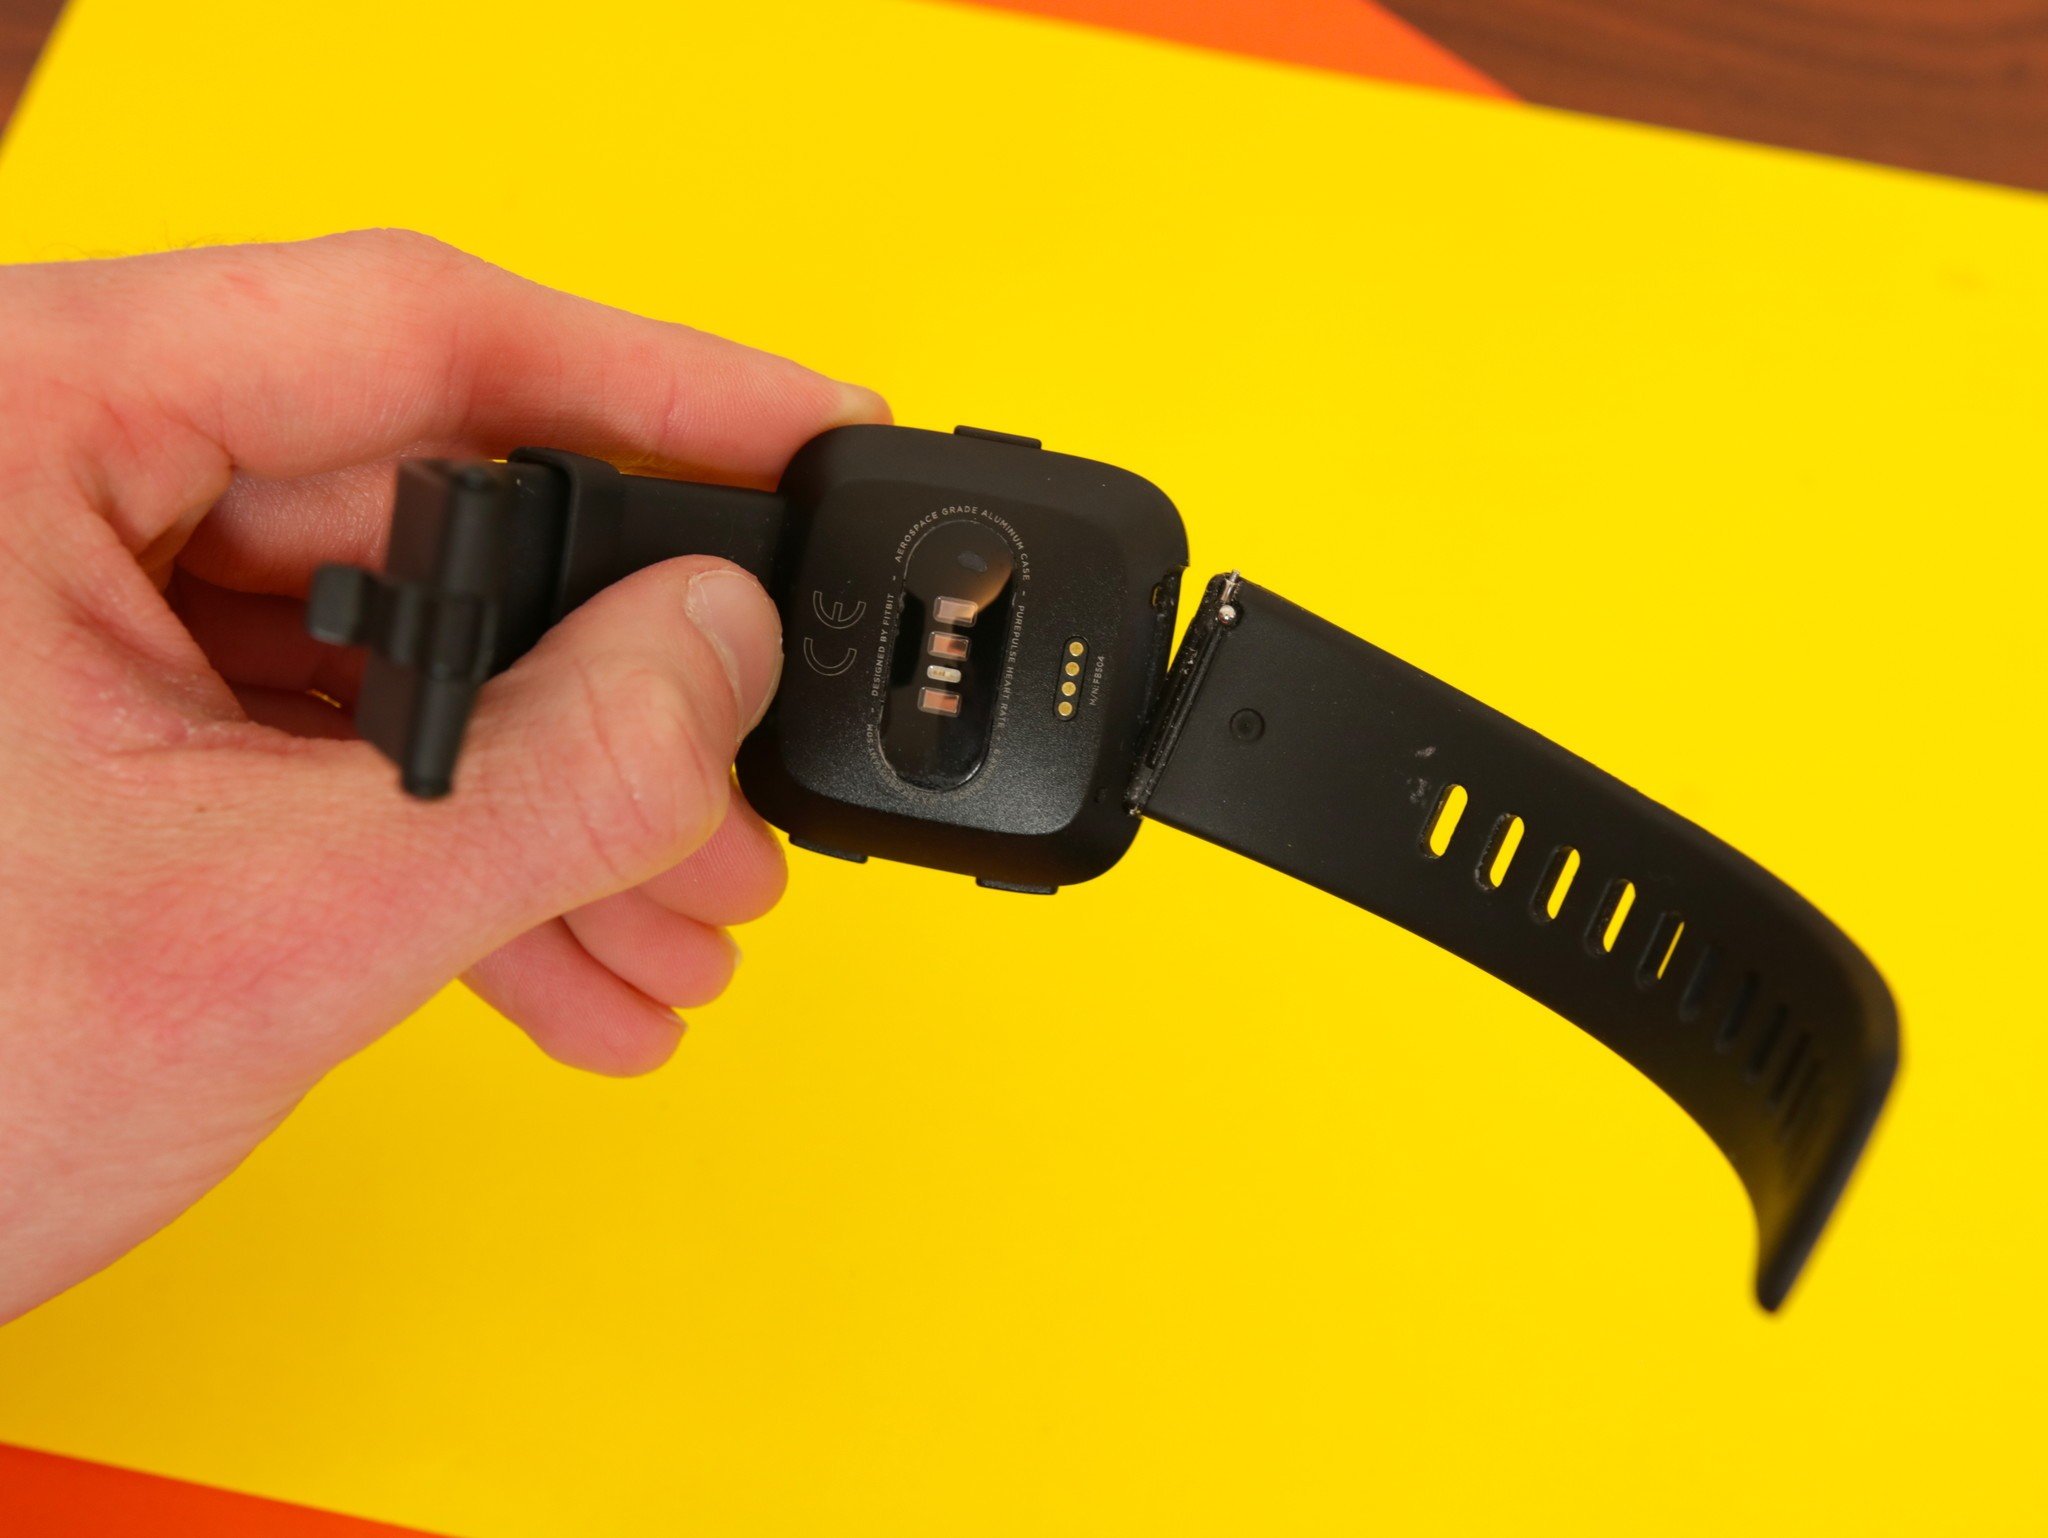
 After you've pushed the pin in, angle the top up so that you can pull out the other end of the pin. Just like with the first step, you don't need a lot of force to get it out.
With this done, repeat the process again for the other end of the band.
Step 3 – Slide the pin of your new band into the Versa
After you've pushed the pin in, angle the top up so that you can pull out the other end of the pin. Just like with the first step, you don't need a lot of force to get it out.
With this done, repeat the process again for the other end of the band.
Step 3 – Slide the pin of your new band into the Versa
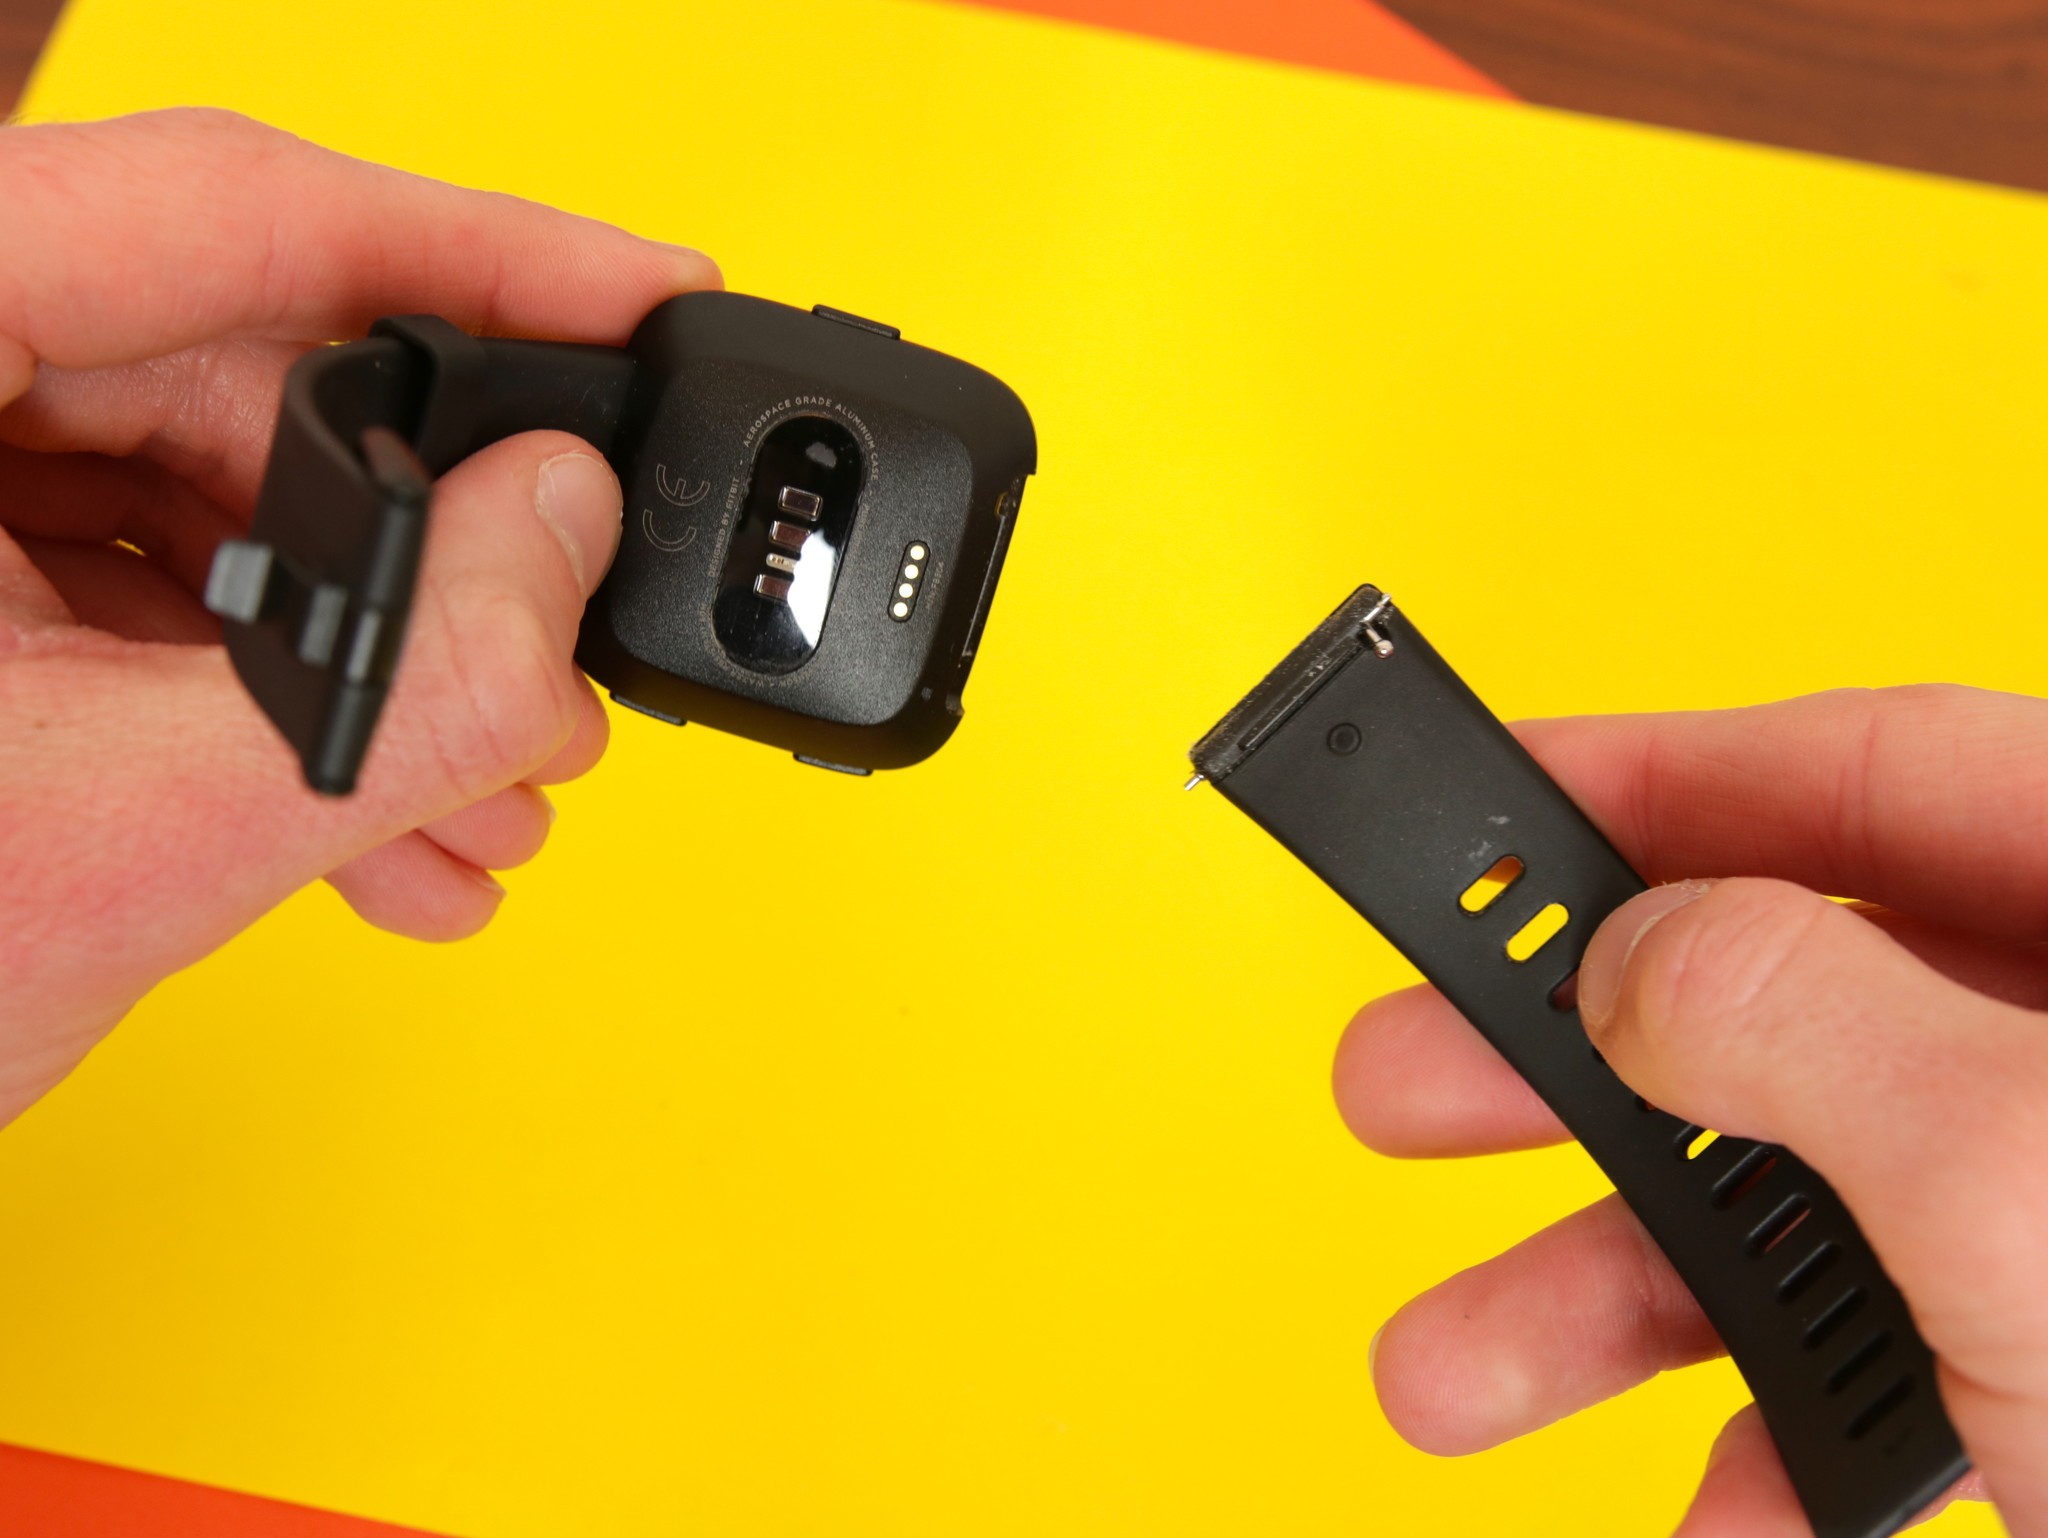
 Now that your old watch band is removed, it's time to connect your new one.
On the new band, push the quick-release pin down so that the end furthest away from the lever is sticking out from the bottom. From here, put it into the corresponding hole.
Step 4 – Set the other end of the pin
Now that your old watch band is removed, it's time to connect your new one.
On the new band, push the quick-release pin down so that the end furthest away from the lever is sticking out from the bottom. From here, put it into the corresponding hole.
Step 4 – Set the other end of the pin
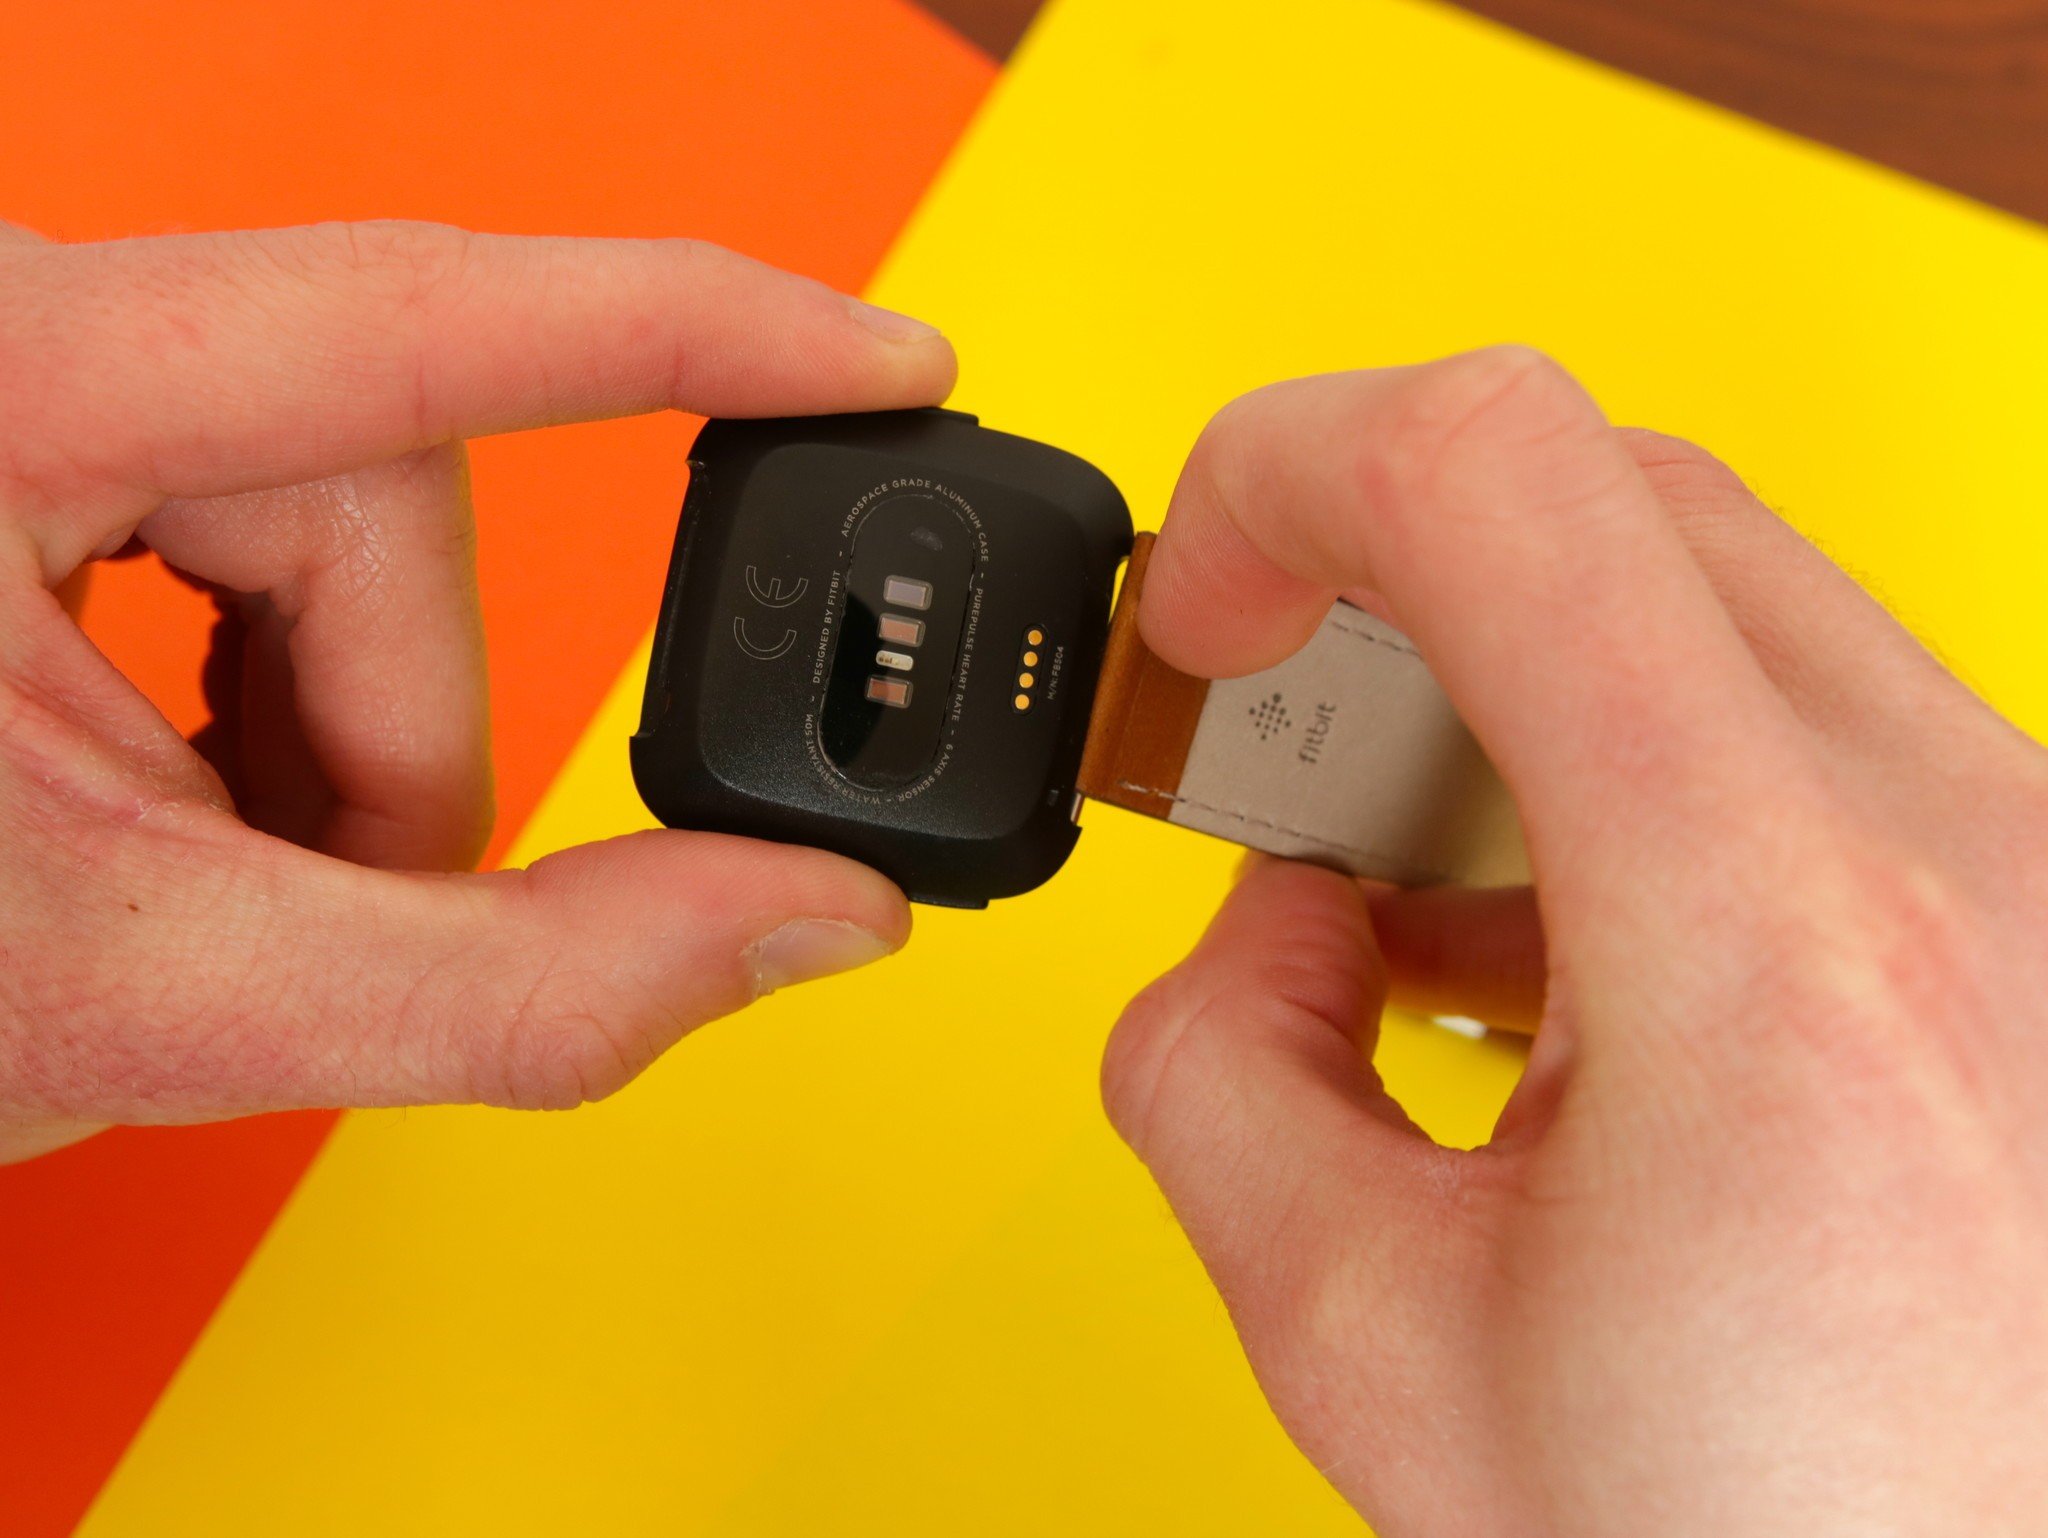
 Lastly, you'll need to connect the top end of the band (the one nearest to the lever).
With the bottom part connected and while still holding down the pin, push down and move it up into place. Let go of the pin and you should hear a small "click" letting you know everything's good to know.
Repeat Steps 3 and 4 to attach the other end of your new band.
Take your time!
The steps required to change the Versa's bands aren't all that complicated, but in practice, the mechanism can be tricky to handle. The pin is occasionally finicky to work with if you've got big fingers, and the bottom end will often pop out of place when trying to attach the top part.
Following these steps as closely as you can will ensure the process is as smooth as possible, but don't freak out if things don't go according to plan at first. Take a deep breath – you got this!
Top 5 things I want to see in Fitbit's next smartwatch
Lastly, you'll need to connect the top end of the band (the one nearest to the lever).
With the bottom part connected and while still holding down the pin, push down and move it up into place. Let go of the pin and you should hear a small "click" letting you know everything's good to know.
Repeat Steps 3 and 4 to attach the other end of your new band.
Take your time!
The steps required to change the Versa's bands aren't all that complicated, but in practice, the mechanism can be tricky to handle. The pin is occasionally finicky to work with if you've got big fingers, and the bottom end will often pop out of place when trying to attach the top part.
Following these steps as closely as you can will ensure the process is as smooth as possible, but don't freak out if things don't go according to plan at first. Take a deep breath – you got this!
Top 5 things I want to see in Fitbit's next smartwatch
source: https://www.androidcentral.com/how-change-fitbit-versa-watch-bands
date: Wed, 25 Apr 2018 11:00:02 +0000
Your picture collection is really superb. That's providing many ideas to explore more knowledge and things. Your post really impressed me. Keep sharing your information with us.
ReplyDeleteFitbit versa 3 watch bands NZ